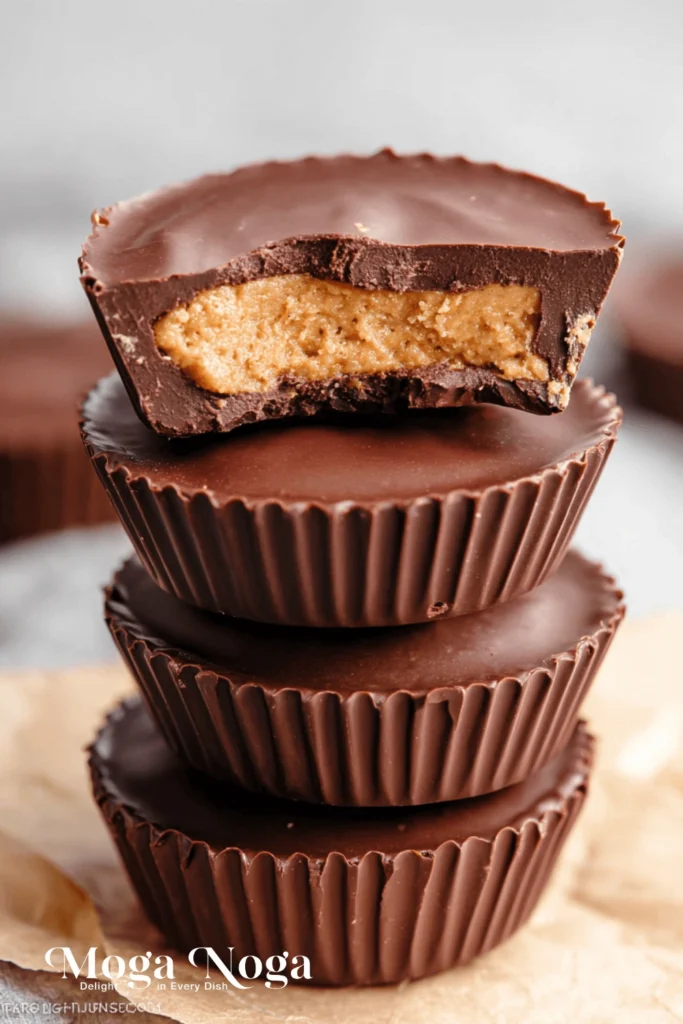
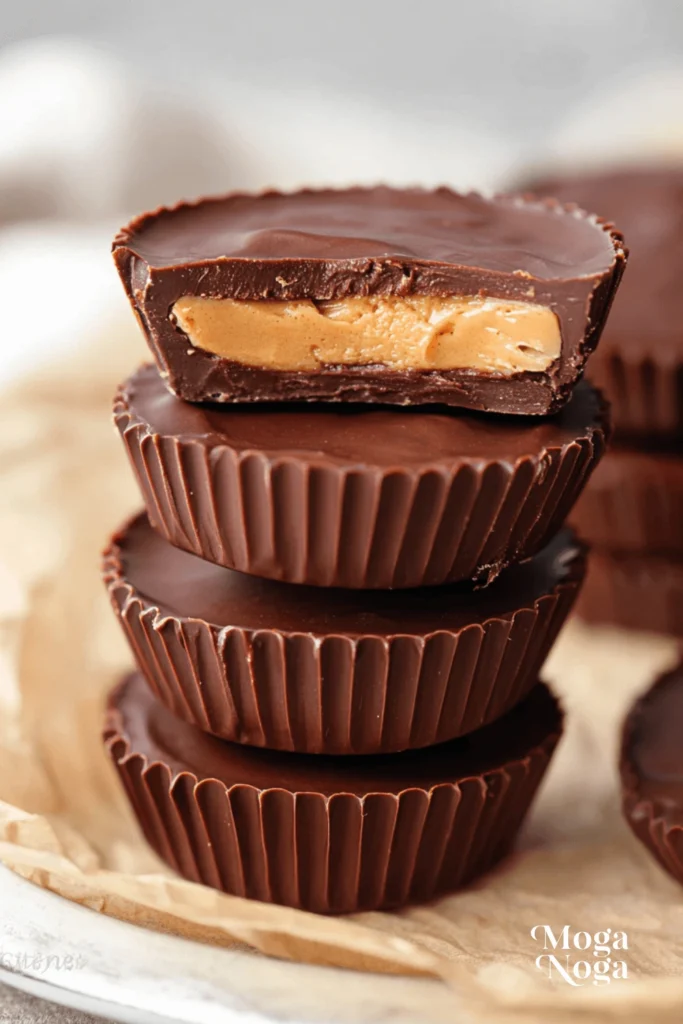
Homemade Reese’s Cups are pure temptation—creamy, rich, and way better than store-bought. One bite, and you’re hooked. With just a few simple steps, you can recreate that dreamy chocolate-peanut butter combo in your own kitchen. Ready to taste what you’ve been missing?
Table of Contents
Why You’ll Love This Recipe :
- Tastes Just Like the Real Thing: You get all the flavor of a store-bought Reese’s Cup but made fresh at home
- Customizable: Use dark, milk, or white chocolate and adjust the sweetness to your liking
- Minimal Ingredients: Just a handful of pantry staples come together in minutes
- Freezer-Friendly: Make a big batch and stash some away for later cravings
- Perfect for Gifting: They look impressive but are easy to package and share
Detailed Ingredients and Instructions :
Making Homemade Reese’s Cups is easier than you think. With just a few basic pantry staples and a simple layering technique, you’ll be on your way to chocolate-peanut butter perfection. Here’s everything you need to know to get it right the first time.
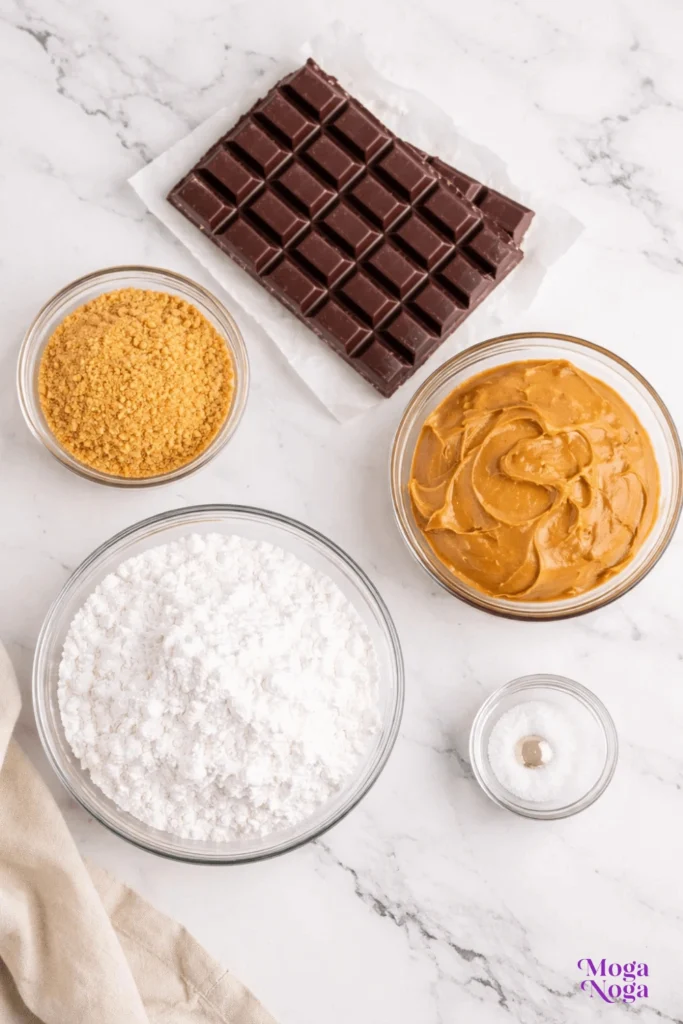
🧈 Ingredients Breakdown
Here’s what you’ll need to create your own Homemade Reese’s Cups:
For the peanut butter filling:
- Creamy peanut butter (unsweetened works best for texture and balance)
- Powdered sugar (adds sweetness and structure)
- Softened butter (helps the filling set and adds richness)
- Vanilla extract (for that warm, candy-shop flavor)
For the chocolate coating:
- Milk or semi-sweet chocolate chips (use quality chocolate for a smoother melt)
- Coconut oil (optional, but helps create a glossy, snappy finish)
You can easily customize this base depending on your preference—dark chocolate for a richer flavor, or almond butter if you want to switch things up.
🥄 Step-by-Step Instructions
Step 1: Make the peanut butter filling
In a medium mixing bowl, combine peanut butter, softened butter, powdered sugar, and vanilla extract. Use a spatula or hand mixer to blend everything into a thick, dough-like texture. The mixture should be soft enough to scoop but firm enough to hold its shape.
Tip: If it’s too sticky, add a little more powdered sugar. If it’s too dry, stir in a spoonful of peanut butter.
Step 2: Melt the chocolate
In a heat-safe bowl, add your chocolate chips and coconut oil. Melt the mixture using a double boiler or by microwaving in short bursts, stirring every few seconds until completely smooth and glossy.
Note: Don’t overheat the chocolate—it can seize or burn. Stir continuously for a creamy, lump-free texture.
Step 3: Prepare the molds or liners
Line a muffin tin with cupcake liners, or use silicone molds for easy release. Add about 1 to 2 teaspoons of melted chocolate into the bottom of each liner. Use the back of a spoon to gently spread the chocolate across the base.
Place the muffin tin in the refrigerator for 5 to 10 minutes to help the bottom chocolate layer firm up before adding the filling.
Step 4: Add the peanut butter layer
Scoop a small ball of the peanut butter mixture (about 1 tablespoon), then flatten it into a disk using your hands. Place the disk gently on top of the chilled chocolate base. Press lightly so it spreads evenly, leaving a bit of space around the edges for the top layer of chocolate to seal.
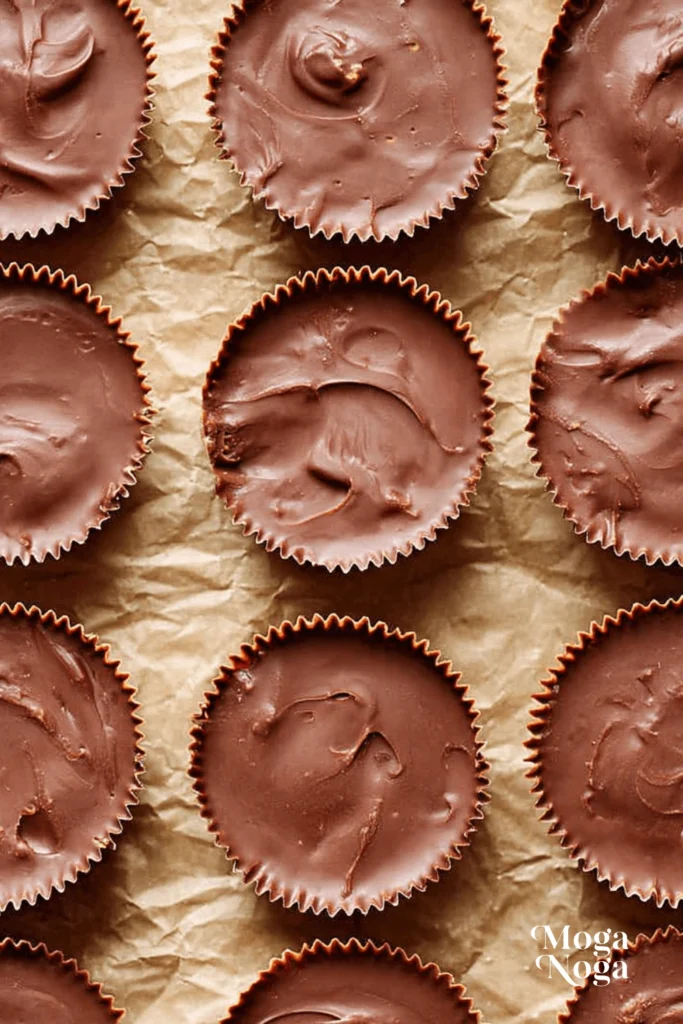
Step 5: Top with more chocolate
Spoon more melted chocolate over the peanut butter layer until it’s fully covered. Gently tap the tray on the counter to smooth the top and eliminate any air bubbles. If needed, use a spoon to swirl or level the surface.
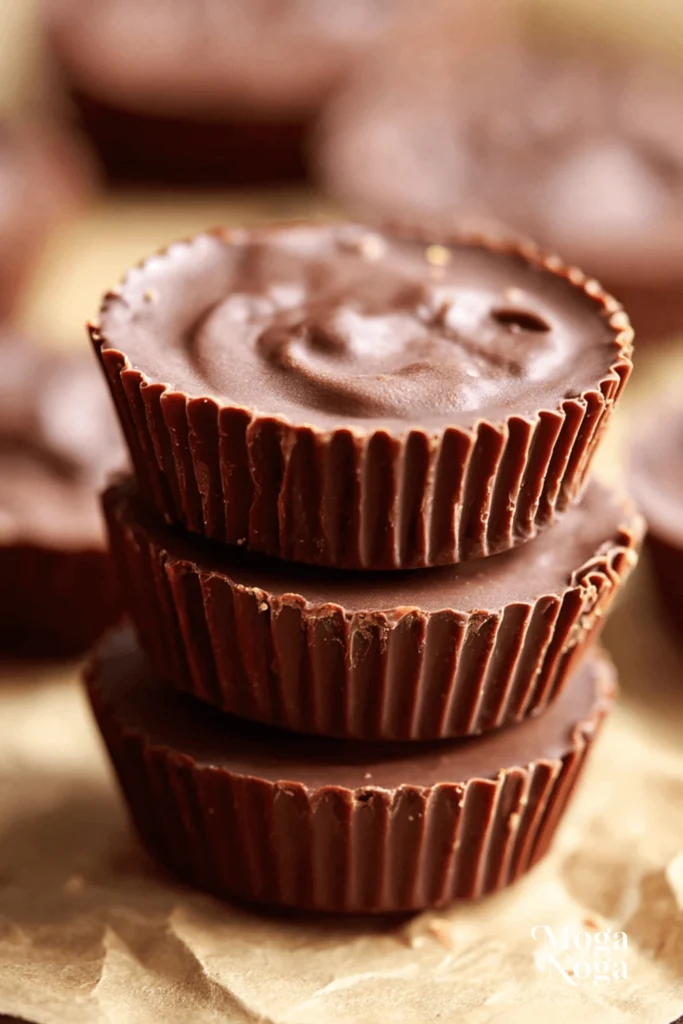
Step 6: Chill until set
Transfer the tray back to the refrigerator and let the Homemade Reese’s Cups chill for at least 30 to 60 minutes. Once firm, peel away the cupcake liners or pop the cups out of the molds.
Tips, Variations, and Storage Options :
Mastering Homemade Reese’s Cups doesn’t stop at just following the recipe. A few smart tips and flavor variations can take your cups from great to unforgettable.
Tips for Success:
- Use room temperature ingredients: Your peanut butter and butter should be soft, not straight from the fridge. This ensures a smooth, creamy filling that’s easy to work with.
- Don’t overheat the chocolate: Melt it slowly using a double boiler or short microwave bursts. Stir frequently to avoid scorching.
- Chill between layers: It might be tempting to rush, but chilling each layer briefly makes a big difference in structure and visual appeal.
- Tap out air bubbles: After pouring the top chocolate layer, gently tap the tray on the counter to release any trapped air and level the surface.
- Use silicone liners for a clean finish: Paper liners are fine, but silicone ones make removal neater and reduce the risk of tearing.
Flavor Variations:
- Sea salt sprinkle: Add a pinch of flaky sea salt on top before chilling for a sweet-salty twist.
- Espresso powder: Stir a bit of instant espresso into the chocolate for a mocha vibe.
- Almond or cashew butter filling: Swap peanut butter for almond or cashew butter for a different nutty profile.
- Coconut version: Add shredded coconut to the peanut butter filling for texture and tropical flair.
- Crispy layer: Mix crushed graham crackers or rice cereal into the filling for a crunch.
Storage Options:
Homemade Reese’s Cups store beautifully, and you can keep them fresh for days—or weeks—with the right technique.
- Refrigerator: Store in an airtight container in the fridge for up to 2 weeks. This keeps the chocolate firm and the filling smooth.
- Freezer: Freeze in a sealed bag or container for up to 2 months. Let thaw for a few minutes at room temperature before enjoying.
- Room temperature: If your home is cool, they can sit out in an airtight container for a few days. But warmer kitchens will cause the chocolate to melt or bloom.
Equipment Needed :
To create the perfect batch of Homemade Reese’s Cups, you don’t need a professional kitchen. Just a few basic tools will do the job:
- Mixing bowls: One for the peanut butter filling and another for melting the chocolate.
- Muffin tin: A standard-size muffin tin holds the classic shape well, but you can also use mini tins for bite-sized versions.
- Cupcake liners or silicone molds: These keep things neat and make removing the cups easy.
- Spoon or cookie scoop: Helpful for portioning the filling and melted chocolate evenly.
- Spatula: Great for scraping every last bit of the filling or melted chocolate.
Optional but helpful tools include a piping bag for neat layers or a kitchen scale for precise portions. But honestly, the charm of Homemade Reese’s Cups is in their rustic, hand-crafted appeal. You don’t need perfection—just great flavor.
Related Recipes :
If you love Homemade Reese’s Cups, you’ll definitely want to try these other chocolate and peanut butter pairings. They’re easy to make and just as crowd-pleasing.
- Peanut Butter Chocolate Fudge: Smooth, dense fudge layered with peanut butter swirls. No bake and totally addictive.
- Peanut Butter Protein Bars: A no-bake snack made with creamy peanut butter, protein-rich ingredients, and a smooth chocolate topping—perfect for fueling busy days.
- No-Bake Peanut Butter Oat Bites: Perfect for a quick snack, these little balls combine oats, peanut butter, honey, and mini chocolate chips.
- Peanut Butter Cheesecake Bites: Creamy, rich cheesecake with a peanut butter twist, coated in chocolate and served chilled.
- Chocolate Covered Pretzel Bites: Sweet and salty lovers, these are for you—pretzels sandwiched with peanut butter and dipped in chocolate.
Each of these treats shares the magic of the peanut butter-chocolate duo, but brings its own twist to the table. Once you master Homemade Reese’s Cups, your kitchen is wide open for all kinds of sweet experiments.
Pairing/Serving Suggestions :
Homemade Reese’s Cups aren’t just a stand-alone dessert. They’re incredibly versatile and can be dressed up for parties, gift boxes, or just a fun treat night.
Serving Ideas:
- With coffee: The richness of the chocolate and peanut butter is perfectly balanced by a bold, hot espresso or latte.
- On a dessert platter: Add these cups to a board with fresh berries, mini cookies, and truffles for an elegant presentation.
- As cupcake toppers: Place a mini Reese’s Cup on a frosted cupcake for a decadent touch.
- In ice cream: Chop them up and sprinkle into vanilla or chocolate ice cream for the ultimate sundae.
- With fruit: Serve alongside sliced bananas or apples for a playful sweet-and-savory combo.
Whether you’re planning a casual movie night or a polished party, Homemade Reese’s Cups fit right in. Their familiar flavor makes them a hit with kids and adults alike.
Frequently Asked Questions :
Can I use natural peanut butter for Homemade Reese’s Cups?
Yes, but there’s a catch. Natural peanut butter often has a looser consistency due to the oil separation. To make it work better, stir it thoroughly first, then consider chilling it slightly before mixing with butter and sugar. You may need to add a little extra powdered sugar to help it firm up.
What kind of chocolate works best?
You can use milk chocolate for a sweeter bite or semi-sweet for a richer flavor. Dark chocolate works too and adds a slightly bitter contrast that many adults love. If you’re looking for that nostalgic taste, go with milk chocolate chips mixed with a little coconut oil to get that silky coating.
Can I make these cups in mini muffin tins?
Absolutely. Using mini tins and liners gives you bite-sized Homemade Reese’s Cups that are perfect for parties, lunchboxes, or little cravings. Just reduce the filling and chocolate quantities by about half for each mini cup.
How do I prevent the layers from separating?
The key is making sure each layer adheres properly. Slightly pressing the peanut butter layer into the base and not over-chilling between steps helps the chocolate and filling bind together as one cohesive cup. Also, let the top layer of chocolate slightly melt into the filling before chilling.
How long do they last?
In the refrigerator, these cups stay fresh for about 2 weeks. In the freezer, they’ll last for up to 2 months if stored in an airtight container. They’re best enjoyed slightly softened at room temperature for ideal texture.
Can I make them vegan?
Definitely. Use dairy-free chocolate and a plant-based butter. Make sure your peanut butter doesn’t contain any dairy additives. You can even find vegan powdered sugar or make your own by blending regular sugar with a bit of cornstarch.
Nutrition Information :
While these Homemade Reese’s Cups are a treat, you might be surprised that making them at home can be slightly more nutritious than the store-bought versions—especially when you control the quality of your ingredients.
Approximate nutrition per standard-size cup:
- Calories: around 180 to 220
- Protein: 4 grams
- Carbohydrates: 16 grams
- Fat: 14 grams
- Sugar: 10 grams
- Fiber: 2 grams
Keep in mind that these numbers vary based on the specific chocolate and peanut butter you use. Opting for dark chocolate and natural peanut butter can increase the fiber and lower the sugar content slightly.
Seasonal and Occasion Variations :
Homemade Reese’s Cups are perfect year-round, but a few tweaks can make them extra special for holidays and occasions. These simple changes will help you add a festive twist without changing the base recipe too much.
- Valentine’s Day: Use heart-shaped silicone molds and top each cup with a drizzle of pink or red-tinted white chocolate. Wrap in red foil for a homemade gift your valentine will love.
- Halloween: Add orange-tinted white chocolate to the top layer, or use spooky sprinkles before the chocolate sets. Serve in themed cupcake liners for a festive touch.
- Christmas: Swirl in peppermint extract into the chocolate layer or sprinkle with crushed peppermint candies. Serve in red and green liners or add gold flakes on top.
- Easter: Use pastel-colored chocolate melts for the top layer or hide a mini chocolate egg inside the peanut butter filling.
- Birthday Parties: Add colorful sprinkles on top before chilling or layer a thin layer of jam under the peanut butter for a surprise twist.
- Back-to-School Snacks: Make mini versions and pack them in lunchboxes with fruit or pretzels. They’re a great no-bake treat that feels special without being over-the-top.
Customizing Homemade Reese’s Cups for the seasons is not only fun but also gives you an excuse to make them again and again without getting bored.
My Recipe Tips :
You can make these cups look and taste professional with just a few extra steps. Here are my go-to tips for leveling up your Homemade Reese’s Cups every single time:
- Chill the peanut butter filling briefly: It firms up quickly and makes it easier to handle when assembling the layers.
- Use two spoons for layering: One for scooping and one for smoothing helps you get even layers without a mess.
- Let the top chocolate layer settle before chilling: Give it a few seconds to self-level before popping it in the fridge for that glossy finish.
- Taste the filling before assembling: Adjust the powdered sugar or salt slightly to suit your personal flavor preferences.
- Keep everything clean: Use a damp cloth to wipe your fingers or utensils between each step to avoid chocolate smudges on the liners.
- Get creative with molds: Silicone muffin cups, novelty holiday shapes, or mini cupcake pans all work great and let you personalize your treats.
With practice, you’ll develop your own rhythm for making these. But even on your first try, these Homemade Reese’s Cups are bound to impress.
Conclusion :
Homemade Reese’s Cups aren’t just a treat—they’re a game-changer. Rich, nostalgic, and shockingly easy, they deliver all the flavor of your favorite candy with none of the mystery ingredients. Once you taste the homemade version, there’s no going back. So grab your peanut butter and chocolate—your new favorite sweet awaits.

Ingredients
1½ cups milk chocolate chips or semi-sweet chocolate chips
½ cup creamy peanut butter
¼ cup powdered sugar
2 tablespoons unsalted butter, melted
½ teaspoon vanilla extract
Instructions
Line a muffin tin with paper liners or lightly grease it.
Melt the chocolate chips in a microwave-safe bowl in 30-second intervals, stirring each time until smooth.
Spoon about 1 tablespoon of melted chocolate into the bottom of each liner and spread evenly.
Place the muffin tin in the refrigerator for 10 minutes to set the chocolate layer.
In a bowl, mix peanut butter, powdered sugar, melted butter, and vanilla extract until smooth and creamy.
Spoon a small amount of the peanut butter mixture onto the set chocolate layer, flattening slightly.
Top with another tablespoon of melted chocolate, covering the peanut butter completely.
Return the muffin tin to the refrigerator and chill for 20–30 minutes until fully set.
Remove from the liners and serve or store chilled.
