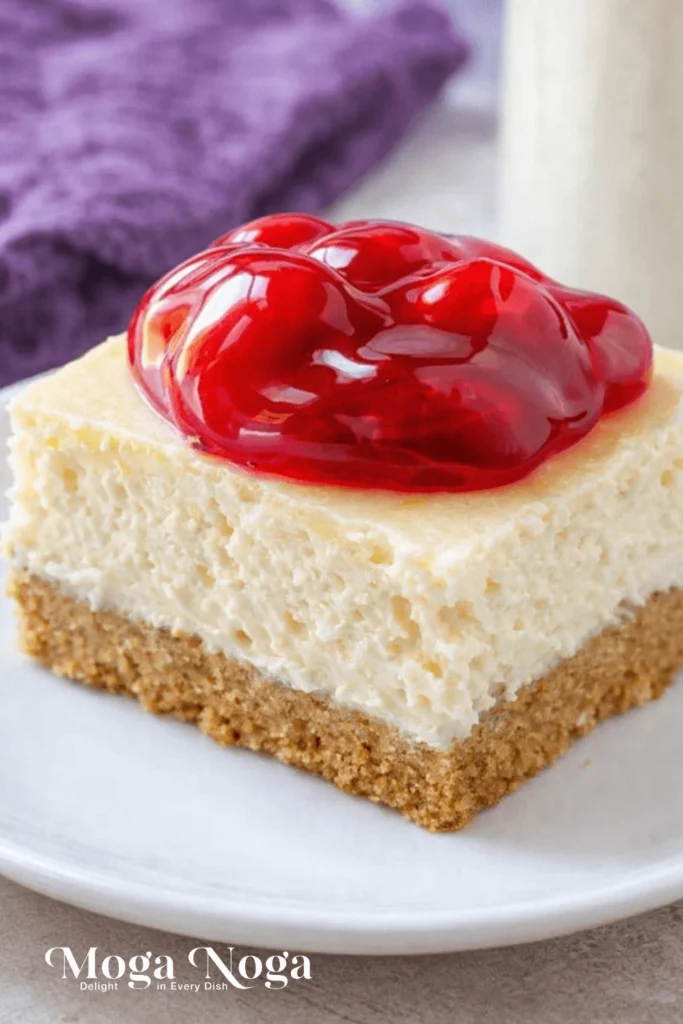
Cherry cheesecake bars are the kind of dessert that quietly steal the spotlight. They look simple, but one bite melts into creamy, tangy, sweet perfection. and somehow, every square feels like a little love letter to comfort.
Table of Contents
Why You’ll Love This Recipe
There’s something undeniably comforting about a dessert that feels both nostalgic and effortless. These cherry cheesecake bars deliver creamy richness, buttery crunch, and bright fruitiness in perfect harmony. They taste like something you’d find in a cozy bakery window, yet they’re surprisingly simple to make at home.
- Perfect Balance of Flavors: The smooth cheesecake layer brings a gentle tang, the crust offers warm sweetness, and the cherry topping adds vibrant brightness. Each bite feels layered and intentional.
- Easy Yet Impressive: You don’t need complicated techniques or specialty tools. These bars look polished, slice beautifully, and always draw compliments at potlucks or family dinners.
- Make-Ahead Friendly: Because cherry cheesecake bars need time to chill, they’re ideal for preparing in advance. Less last-minute stress means more time to enjoy the moment.
- Crowd-Pleasing Appeal: Nearly everyone loves cheesecake, and the addition of cherries adds that extra touch of nostalgia that feels familiar and comforting.
Once you taste that first chilled square, you’ll understand why this dessert becomes a repeat request.
Detailed Ingredients and Instructions
Now let’s break down exactly what goes into these cherry cheesecake bars and how to prepare them step by step.
Ingredients Breakdown
Each ingredient plays a specific role in building flavor and texture.
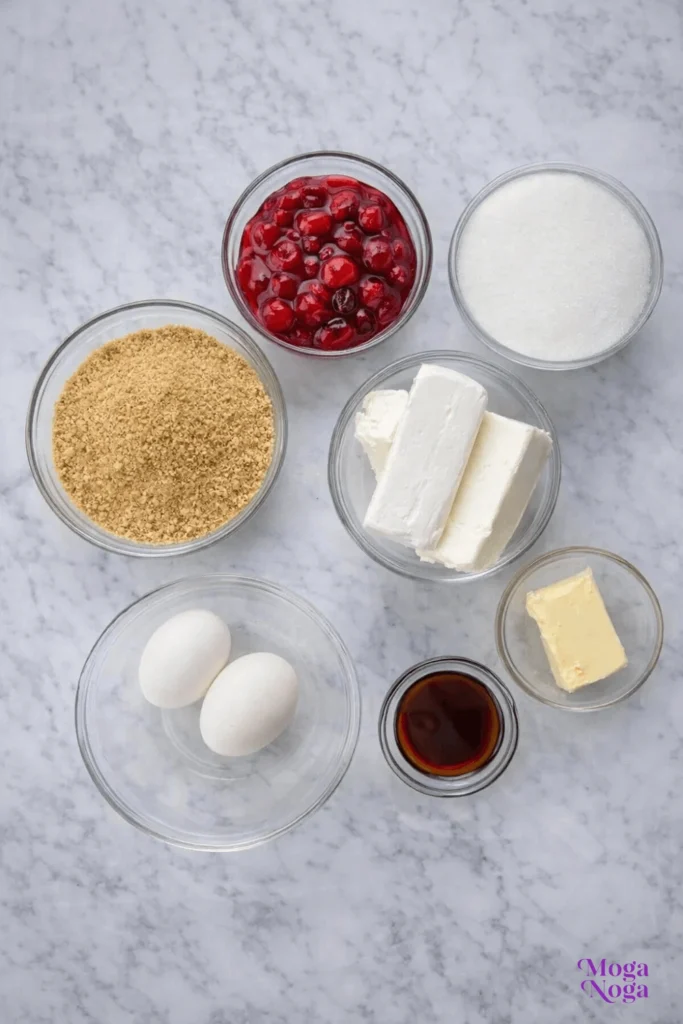
- Graham Cracker Crumbs: Form the sturdy yet tender base. Their subtle honey flavor complements the creamy filling beautifully.
- Unsalted Butter: Melted butter binds the crumbs together and creates that rich, slightly toasted crust after baking.
- Granulated Sugar: Enhances sweetness in both the crust and filling while balancing the tang of the cream cheese.
- Cream Cheese: The star of the show. Full-fat cream cheese ensures a smooth, rich, and creamy cheesecake layer.
- Eggs: Provide structure and help the filling set properly without becoming overly dense.
- Vanilla Extract: Adds warmth and depth, rounding out the flavors with a soft sweetness.
- Sour Cream: Contributes a gentle tang and keeps the texture silky instead of heavy.
- Cherry Pie Filling: Brings bold color, glossy shine, and fruity sweetness that defines classic cherry cheesecake bars.
Step-by-Step Instructions
Follow these steps carefully to achieve perfectly creamy bars with a stable crust.
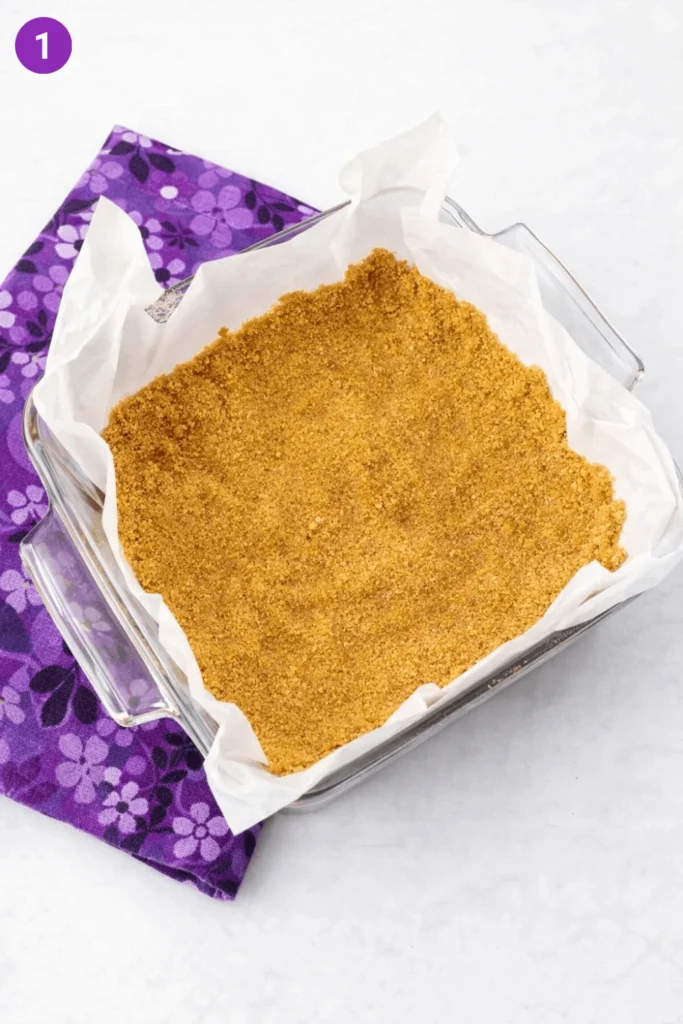
Prepare the Pan: Line a square baking pan with parchment paper, allowing extra paper to hang over the sides. This makes lifting and slicing much easier later.
Make the Crust: Combine graham cracker crumbs, melted butter, and sugar until evenly moistened. Press the mixture firmly into the bottom of the pan to create a compact base that won’t crumble.
Pre-Bake the Crust: Bake the crust for 8 to 10 minutes. This step firms it up and adds a slightly toasted flavor that contrasts beautifully with the creamy filling.
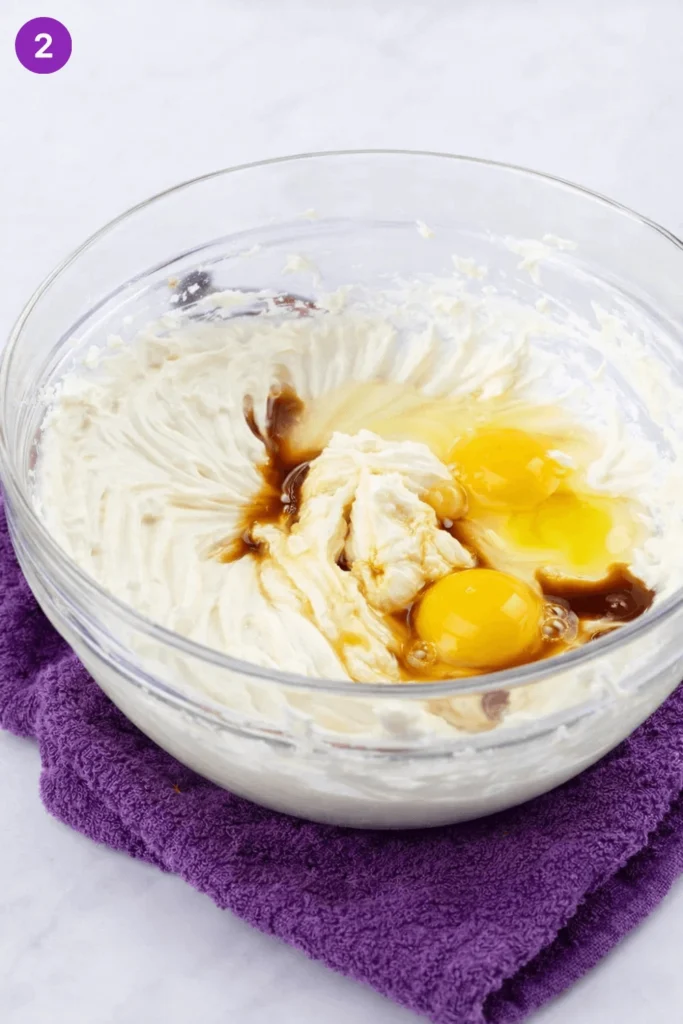
Beat the Cream Cheese and Sugar: Mix softened cream cheese with sugar until completely smooth. A lump-free base is essential for silky cherry cheesecake bars.
Add the Eggs: Incorporate eggs one at a time, mixing gently. Overmixing can introduce air bubbles, which may cause cracks during baking.
Blend in Sour Cream and Vanilla: Stir until just combined. This ensures a creamy, balanced flavor without overworking the batter.
Pour and Smooth the Filling: Spread the cheesecake mixture evenly over the crust. Smooth the top to promote even baking.
Bake Gently: Bake until the center is set but still slightly jiggly. This prevents overbaking and keeps the texture soft and creamy.
Cool Gradually: Allow the bars to cool at room temperature before refrigerating. Gradual cooling helps prevent cracks and maintains a smooth surface.
Chill Completely: Refrigerate for several hours until fully firm. Chilling allows the flavors to deepen and the texture to stabilize.
Add the Cherry Topping: Spread the cherry pie filling evenly across the chilled cheesecake layer. The glossy red topping gives cherry cheesecake bars their signature look.
Slice Cleanly: Use a sharp knife and wipe it between cuts for neat, bakery-style squares.
Tips, Variations, and Storage Options
Once you’ve mastered the base recipe, cherry cheesecake bars become incredibly versatile. A few thoughtful adjustments can elevate texture, deepen flavor, or adapt the dessert for different occasions. Here’s how to make them truly your own.
Expert Tips
- Use Room Temperature Ingredients: Allow the cream cheese, eggs, and sour cream to sit out before mixing. This helps create a smooth batter and prevents lumps that can affect texture.
- Do Not Overmix the Batter: Mix just until combined, especially after adding the eggs. Overmixing introduces excess air, which can cause cracks or uneven baking.
- Line the Pan Properly: Use parchment paper with overhang on the sides. This small step makes removing and slicing your cherry cheesecake bars clean and stress-free.
- Chill Longer Than You Think: Even if the bars feel firm after a few hours, giving them extra chilling time improves both flavor and structure.
Delicious Variations
- Chocolate Cherry Twist: Add a thin layer of melted dark chocolate over the crust before pouring in the cheesecake filling. The combination of chocolate and cherries feels rich and slightly indulgent.
- Fresh Cherry Upgrade: When cherries are in season, cook fresh pitted cherries with a bit of sugar and lemon juice for a homemade topping that tastes brighter and more vibrant.
- Gluten-Free Option: Swap traditional graham crackers for gluten-free graham crumbs or crushed gluten-free cookies to keep the crust sturdy without compromising texture.
- Swirled Cherry Design: Instead of spreading the topping entirely on top, spoon small amounts of cherry filling into the cheesecake batter before baking and swirl gently with a knife for a marbled effect.
Storage Options
- Refrigerator Storage: Store cherry cheesecake bars in an airtight container in the refrigerator for up to five days. Keeping them sealed prevents them from absorbing other flavors.
- Freezing Option: Wrap individual squares tightly in plastic wrap and place them in a freezer-safe container. They can be frozen for up to two months. Thaw overnight in the refrigerator before serving.
- Serving After Storage: For the best texture, let refrigerated bars sit at room temperature for about 15 minutes before serving. This slight softening enhances the creaminess.
Equipment Needed
You don’t need a professional kitchen to create beautiful cherry cheesecake bars. A few reliable tools are all it takes to ensure smooth preparation and clean presentation.
- 8×8 or 9×9 Inch Baking Pan: Provides the perfect thickness for sturdy yet creamy bars.
- Mixing Bowls: Essential for combining crust ingredients and preparing the cheesecake batter separately.
- Electric Mixer: Helps achieve a lump-free, silky filling without overworking your arm.
- Rubber Spatula: Ideal for scraping down the bowl and smoothing the top evenly before baking.
- Parchment Paper: Makes lifting and slicing effortless while keeping the pan easy to clean.
With these simple tools, you’ll feel confident every step of the way.
Related Recipes
If you love cherry cheesecake bars, there are plenty of other desserts that capture the same creamy, comforting spirit.
- Classic New York Cheesecake: A rich, dense version with a graham crust and no topping, perfect for purists.
- Strawberry Swirl Cheesecake Bars: A fruity alternative that offers bright color and gentle sweetness.
- Lemon Cheesecake Squares: A tangy, refreshing twist that feels lighter but just as indulgent.
- Strawberry Cheesecake: Features a velvety smooth cream cheese filling topped with sweet, glossy strawberries for a classic dessert that feels fresh, romantic, and irresistibly creamy.
- Chocolate Chip Cheesecake Bars: A playful variation that adds pockets of chocolate throughout the filling.
Pairing and Serving Suggestions
Cherry cheesecake bars are delicious on their own, but pairing and presentation can elevate them into something truly memorable. Whether you’re serving them at a dinner party or enjoying a quiet slice at home, thoughtful accompaniments make the experience even better.
Drink Pairings
- Freshly Brewed Coffee: The slight bitterness of coffee balances the sweetness of the cherries and enhances the creamy filling.
- Black Tea: A warm cup of tea offers gentle contrast without overpowering the dessert.
- Sparkling Rosé: For special occasions, a chilled glass adds elegance and complements the fruity topping beautifully.
Side Pairings
- Fresh Berries: A small handful of raspberries or blueberries adds brightness and visual appeal.
- Whipped Cream: A light dollop softens each bite and adds an airy texture.
- Vanilla Ice Cream: For a more indulgent dessert plate, serve a small scoop alongside a chilled square.
Presentation Ideas
- Clean-Cut Squares: Slice evenly and wipe the knife between cuts for sharp edges that look professional.
- Dusting of Powdered Sugar: A light sprinkle around the plate creates subtle elegance.
- Layered Dessert Platter: Arrange bars on a white serving tray with fresh cherries scattered around for visual impact.
Frequently Asked Questions
Here are some of the most common questions people ask when making cherry cheesecake bars for the first time.
Can I use fresh cherries instead of canned pie filling?
Yes, you can absolutely use fresh cherries. Simply pit and cook them with a bit of sugar and lemon juice until they soften and release their juices. Let the mixture cool and thicken before spreading it over the chilled bars. This gives your cherry cheesecake bars a brighter, more natural fruit flavor.
Why did my cheesecake layer crack?
Cracks usually happen from overmixing the batter or overbaking. Too much air in the filling expands during baking and then collapses as it cools. Bake just until the center has a slight jiggle and allow the bars to cool gradually at room temperature before refrigerating.
How do I get clean slices?
Use a sharp knife and wipe it clean with a damp cloth between each cut. Chilling the bars thoroughly before slicing is also key. Well-chilled cherry cheesecake bars hold their shape beautifully.
Can I make these ahead of time for a party?
Absolutely. In fact, they’re better when made a day in advance. The extra chilling time allows the flavors to deepen and the texture to fully set, making them easier to slice and serve.
Can I double the recipe?
Yes, simply use a larger baking pan and adjust the baking time slightly. Keep an eye on the center and look for that gentle jiggle to know when they’re ready.
Nutrition Information
Here’s a general nutritional overview to help you plan and portion confidently.
Per Serving
- Calories: Approximately 280–320 depending on portion size
- Protein: Around 4–6 grams
- Carbohydrates: Approximately 30–35 grams
- Sugar: Around 20–25 grams
- Fat: Approximately 16–20 grams
- Fiber: About 1 gram
These values may vary depending on ingredient brands and portion size, but they give you a helpful baseline.
Seasonal and Occasion Variations
One of the best things about cherry cheesecake bars is how easily they adapt to different seasons and celebrations. With a few thoughtful tweaks, they can feel fresh year-round.
Spring/Summer
- Fresh Cherry Citrus Bars: Add lemon zest to the cheesecake filling for a bright, sunny flavor that feels perfect for warm weather gatherings.
- Berry Blend Topping: Combine cherries with strawberries or raspberries for a colorful, vibrant twist ideal for outdoor parties.
Fall
- Spiced Cherry Cheesecake Bars: Add a pinch of cinnamon or nutmeg to the crust for a subtle warmth that pairs beautifully with autumn flavors.
- Chocolate Cherry Harvest Version: Drizzle melted dark chocolate over the top for a richer dessert suited to cozy evenings.
Winter
- Dark Chocolate Cherry Bars: Fold mini chocolate chips into the cheesecake layer for a deeper, more indulgent flavor.
- Almond Cherry Delight: Add a drop of almond extract to the filling to create a flavor combination reminiscent of classic holiday treats.
Holiday Ideas
- Valentine’s Day Squares: Use heart-shaped cookie cutters to create romantic portions topped with extra cherry glaze.
- Christmas Dessert Tray Addition: Slice into smaller squares and arrange with powdered sugar dusting for a festive dessert spread.
My Recipe Tips
After making cherry cheesecake bars countless times, I’ve learned a few simple insights that truly elevate the final result.
- Pro Insight: Always press the crust firmly and evenly. A well-compacted crust creates clean slices and prevents crumbling.
- Common Mistake to Avoid: Don’t rush the chilling process. Cutting too soon leads to messy edges and softer centers.
- Flavor Enhancement Secret: A tiny pinch of salt in the filling sharpens the sweetness and balances the cherries beautifully.
- Texture Refinement Tip: For ultra-smooth filling, scrape down the bowl frequently while mixing to eliminate hidden lumps.
Conclusion
Cherry cheesecake bars are more than just a dessert. They’re a blend of creamy comfort, buttery crunch, and bright sweetness that feels both nostalgic and indulgent.
They’re simple enough for a weekday treat yet elegant enough for celebrations. With the right technique and a little patience, you’ll create a dessert that looks impressive and tastes unforgettable.
Once you make these cherry cheesecake bars, don’t be surprised if they become your signature sweet.

Ingredients
For the crust:
1 ½ cups graham cracker crumbs (about 10 full graham crackers, finely crushed)
⅓ cup granulated sugar
½ cup unsalted butter, melted
For the cheesecake filling:
2 blocks (8 ounces each) full-fat cream cheese, softened to room temperature
⅔ cup granulated sugar
2 large eggs, room temperature
1 teaspoon pure vanilla extract
¼ cup sour cream
1 tablespoon all-purpose flour
For the topping:
1 can (21 ounces) cherry pie filling
½ cup fresh cherries, halved (optional, for extra texture and flavor)
Instructions
Preheat your oven to 350°F (175°C). Line a 9x9-inch baking pan with parchment paper, leaving some overhang for easy removal.
In a medium bowl, combine the graham cracker crumbs and sugar. Stir in the melted butter until the mixture resembles wet sand.
Press the crust mixture firmly and evenly into the bottom of the prepared pan. Bake for 8–10 minutes, then remove from the oven and let it cool slightly.
In a large mixing bowl, beat the softened cream cheese with an electric mixer until smooth and creamy, about 2–3 minutes.
Add the sugar and mix until fully incorporated. Beat in the eggs one at a time, mixing just until combined after each addition.
Mix in the vanilla extract, sour cream, and flour. Beat until smooth and silky, being careful not to overmix.
Pour the cheesecake batter over the pre-baked crust and spread evenly with a spatula.
Bake for 30–35 minutes, or until the center is set but still slightly jiggly in the middle.
Remove from the oven and let cool completely at room temperature. Then refrigerate for at least 3 hours (or overnight) to fully set.
Once chilled, spread the cherry pie filling evenly over the top. For extra freshness, scatter the halved fresh cherries over the filling.
Lift the bars out using the parchment overhang and slice into squares with a sharp knife. Wipe the knife clean between cuts for neat edges.
