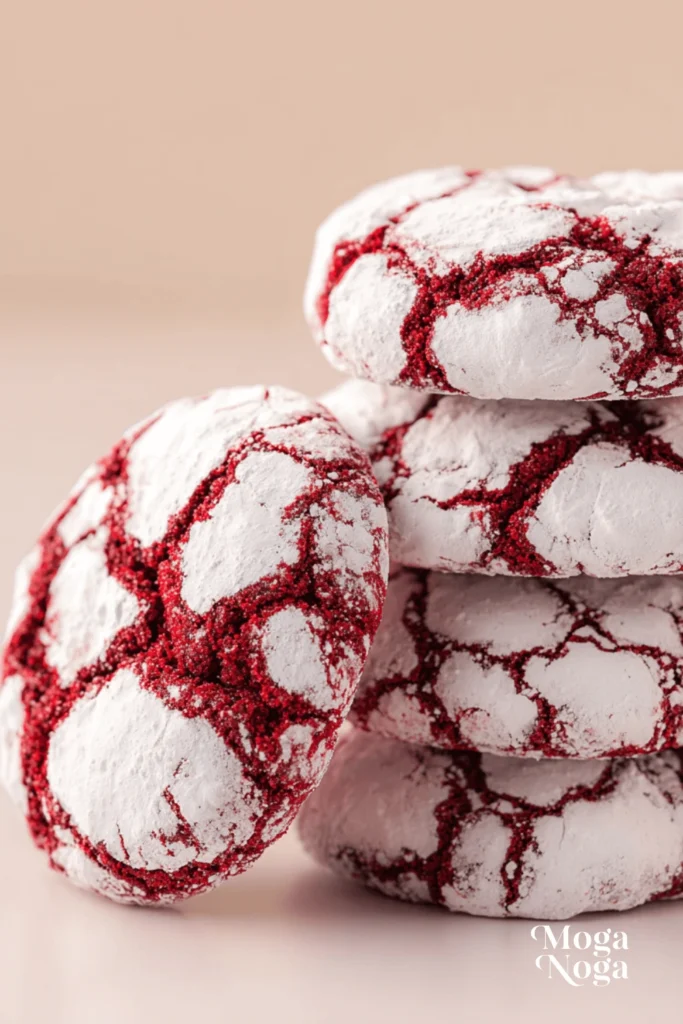
Red velvet crinkle cookies are more than just another holiday treat—they’re a crowd-pleasing classic that combines the deep, cocoa-kissed richness of red velvet cake with the soft chew of a freshly baked cookie. Coated in a generous layer of powdered sugar and baked to perfection, these cookies develop their signature crinkled tops that look like snowy mountain peaks, making them a visual standout at any dessert table. Whether you’re baking for Christmas, Valentine’s Day, or just a cozy weekend at home, this cookie recipe delivers both style and substance in every bite.
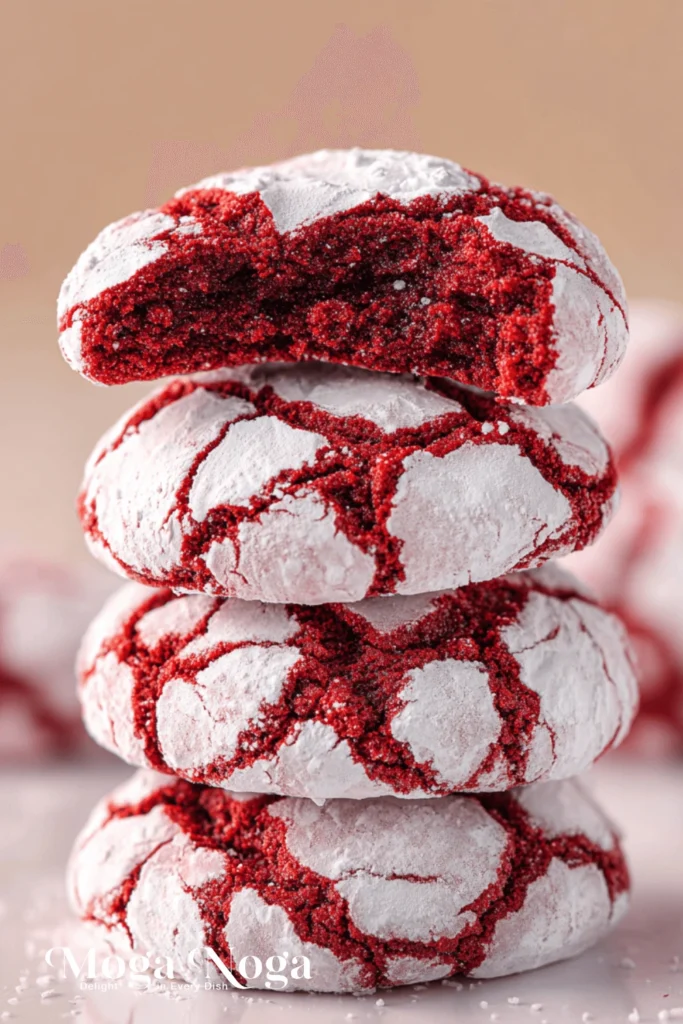
What makes red velvet crinkle cookies so special is their ability to strike that perfect balance—soft and cakey on the inside, just a little crisp on the edges, and with a flavor that’s both familiar and luxurious. While red velvet cake has long been a bakery favorite, translating its rich flavor into a crinkle cookie brings new life to an old favorite in a form that’s easy to make, share, and store.
This article will walk you through everything you need to know: from the ingredients that make these cookies uniquely crave-worthy, to baking tips, seasonal variations, and serving ideas that’ll inspire you to bake them again and again. Whether you’re a seasoned home baker or just getting your feet wet in the kitchen, red velvet crinkle cookies are one of those foolproof bakes that offer high reward with minimal effort—and we’re here to help you get every detail right.
Table of Contents
Why You’ll Love This Recipe
Red velvet crinkle cookies are more than just pretty—they’ve got the kind of flavor and texture that keep people coming back for more. Here’s why they deserve a permanent spot in your baking rotation:
- They’re the perfect mix of flavor and texture
These cookies take everything you love about red velvet cake—the subtle cocoa flavor, the touch of tang from buttermilk or vinegar, and the soft crumb—and turn it into something handheld and snackable. Add the sugary crunch of the crinkle topping, and you’ve got a cookie that offers contrast in every bite. - They’re festive, without being complicated
Let’s be real: not every festive dessert has to take hours. Red velvet crinkle cookies look like they came out of a fancy bakery box, but they’re incredibly simple to make. There’s no rolling dough out, no need for piping bags, and no long wait times. Just mix, chill, roll in sugar, and bake. - They’re versatile for all occasions
Sure, they shine during the holidays. But these cookies also work beautifully for birthdays, potlucks, or whenever you’re craving something rich but not overly heavy. Their bright red color makes them ideal for themed events, and with a few tweaks, you can adapt them for nearly any occasion (more on that later). - They store and travel well
Crinkle cookies are fantastic for gift boxes, bake sales, and cookie swaps. Their powdered sugar coating helps lock in moisture, so they stay soft for days without losing their appeal. Plus, they freeze well—meaning you can make a big batch and enjoy them over time. - They make you look like a pro
Even if you’re new to baking, these cookies have a polished, eye-catching finish that looks like you put in way more effort than you did. The cracked tops, bold color, and snowy sugar contrast never fail to impress. - They’re great for kids and adults alike
If you’re baking with little ones, rolling dough balls in powdered sugar is a fun, hands-on task. And let’s be honest—most adults aren’t going to turn down a plate of homemade red velvet crinkle cookies either. The flavor is familiar, nostalgic, and crowd-friendly. - They can be made ahead
Got a busy week or a holiday party coming up? No problem. You can make the dough in advance and refrigerate it for a day or two. You can also roll the dough into balls and freeze them before baking, then pull them out when you need fresh cookies fast. It’s a time-saving trick that makes life easier without compromising taste or texture.
In short, red velvet crinkle cookies are everything you want in a homemade treat—easy, pretty, delicious, and endlessly adaptable. Whether you’re baking for your family, your coworkers, or just yourself, this recipe hits all the right notes. Up next, we’ll break down the ingredients and baking steps so you can confidently make your first (or tenth) batch.
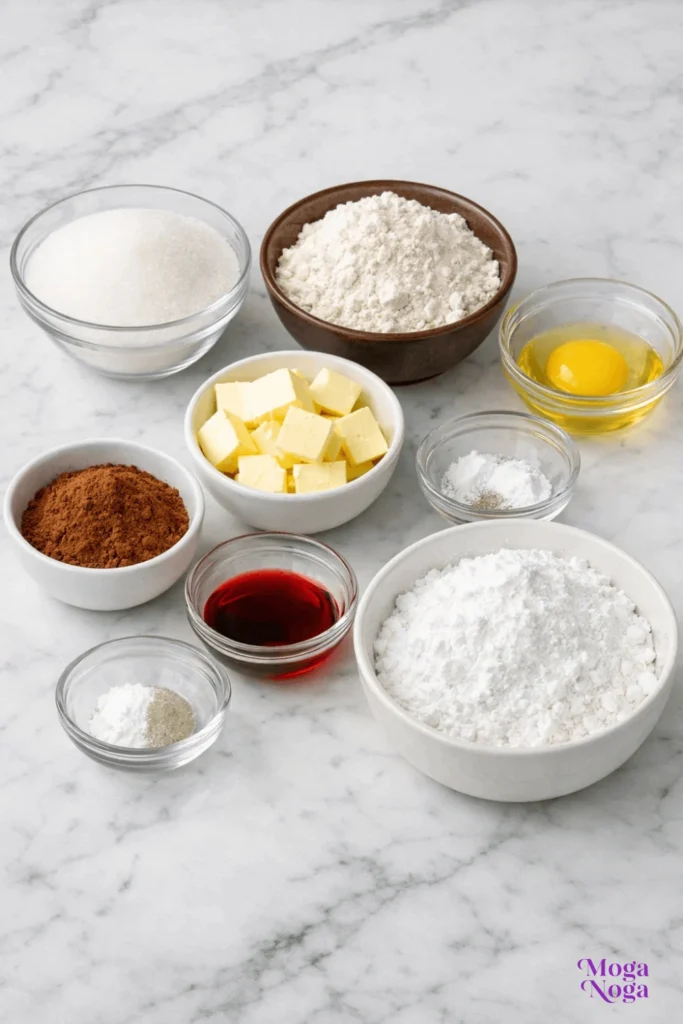
Detailed Ingredients and Instructions
Making red velvet crinkle cookies is easier than you might think, and understanding the purpose behind each ingredient helps you get the best possible results. Below, we’ll walk through each component and step of the process with practical explanations and tips.
- Flour
All-purpose flour forms the structure of these cookies. It balances softness with just enough chew, giving you a cookie that holds its shape while remaining tender inside. Don’t pack your flour—scoop and level for accuracy to avoid dry dough. - Unsweetened cocoa powder
Red velvet is known for its subtle chocolate flavor, and cocoa powder is how we achieve that. Use natural cocoa powder for a slightly tangy depth that pairs perfectly with the other ingredients. Too much can overpower the red velvet character, so stick to the amount recommended in the recipe card. - Baking powder
This leavening agent gives your cookies lift and puff. It helps create that beautifully cracked surface during baking, which is key for a crinkle cookie’s iconic look. - Salt
A small pinch enhances every other flavor in the cookie. Even though these are sweet treats, a bit of salt brings balance and makes the richness pop. - Granulated sugar
This is your primary sweetener. It also helps with structure and contributes to the cookie’s golden edges. In some recipes, you might see brown sugar added, but granulated sugar works best for keeping these cookies light and cake-like. - Vegetable oil
Using oil instead of butter keeps the texture moist and tender. Oil also helps the cookies stay soft for longer and gives them that smooth, velvety crumb. Neutral-flavored oils like canola or vegetable oil work best here. - Eggs
Eggs add moisture and richness, while also helping bind everything together. They’re crucial for that glossy, cohesive dough that’s easy to scoop and shape. - Vanilla extract
A splash of vanilla rounds out the flavors and adds a warm, comforting note. It might be subtle, but it makes a difference in the overall taste. - White vinegar
This might surprise you, but a little vinegar is traditional in red velvet desserts. It enhances the red color and interacts with the baking powder to create lift. You won’t taste it, but it’s an essential part of the chemistry. - Red food coloring
This is what gives the cookies their signature bold red hue. Gel food coloring is more concentrated and vibrant, so a little goes a long way. If using liquid coloring, you may need to adjust the amount slightly to get the right shade. - Powdered sugar
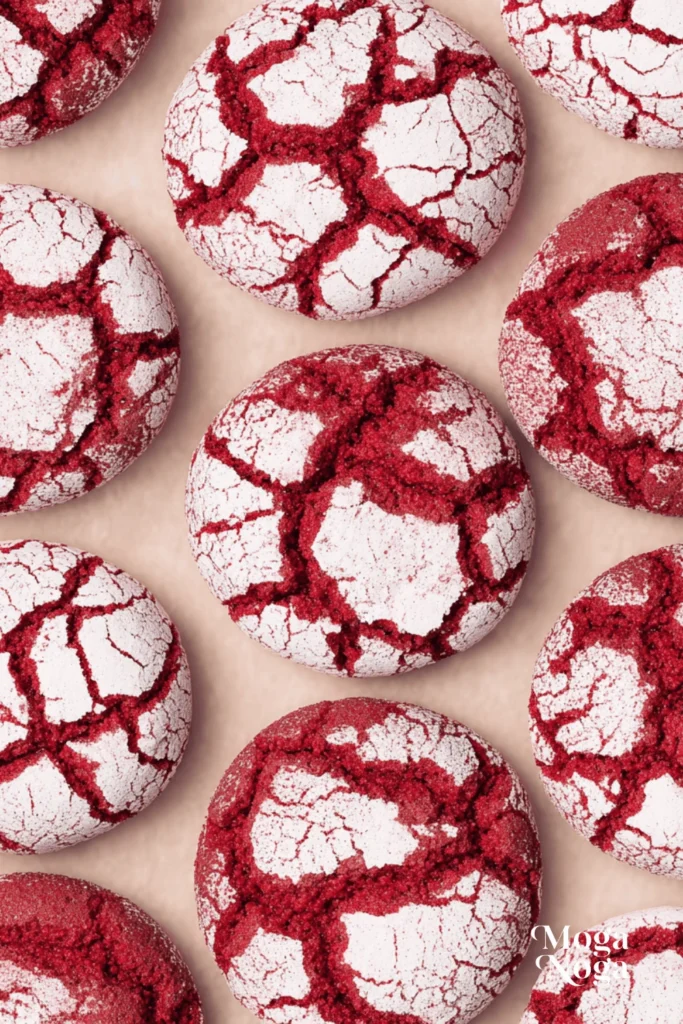
Rolling the dough balls in powdered sugar right before baking creates that signature crinkled look. As the cookies spread in the oven, the sugar coating cracks and reveals the red dough underneath.
Step-by-Step Instructions
- Step one: Mix the dry ingredients
In a medium bowl, whisk together flour, cocoa powder, baking powder, and salt. Set this mixture aside. Doing this first ensures the leavening agent and cocoa are evenly distributed before you add them to the wet ingredients. - Step two: Whisk the wet ingredients
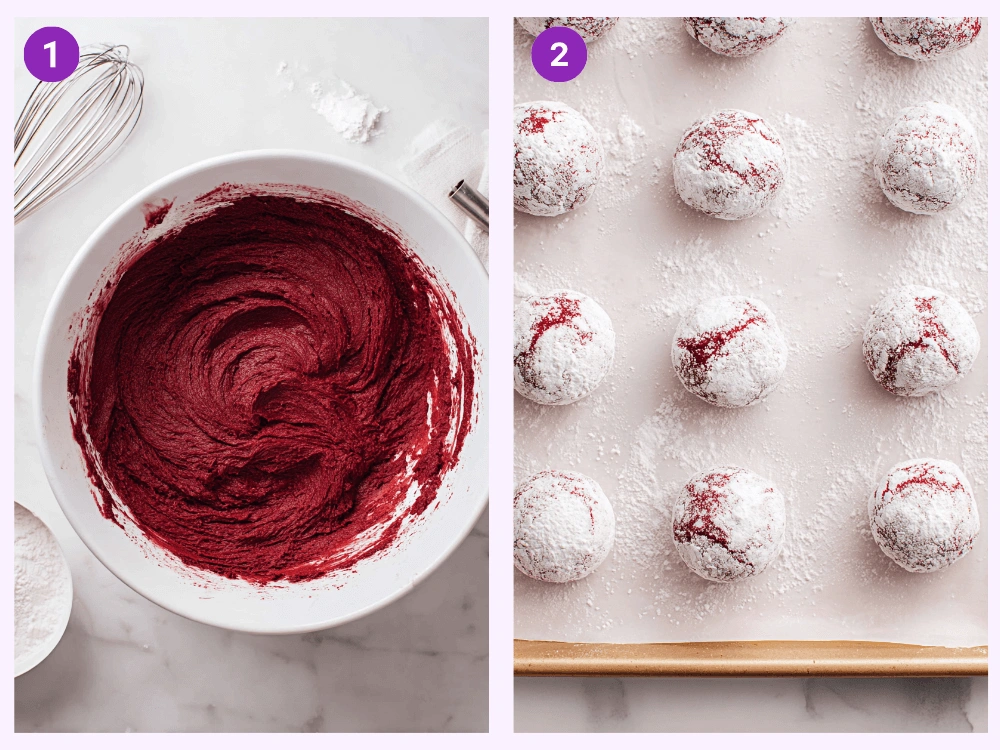
In a larger mixing bowl, combine the sugar, oil, eggs, vanilla extract, vinegar, and red food coloring. Whisk until smooth. This mixture should be vibrant and slightly thick—don’t worry if it looks intense, it will mellow out once the dry ingredients are added. - Step three: Combine wet and dry
Slowly add the dry mixture to the wet, stirring gently with a spatula or spoon until a thick dough forms. It might look too soft at first, but it will firm up once chilled. - Step four: Chill the dough
Cover the bowl with plastic wrap and refrigerate for at least an hour. This is essential—chilling firms up the dough, making it easier to roll and helping the cookies hold their shape in the oven. - Step five: Preheat and prepare
When you’re ready to bake, preheat your oven and line a baking sheet with parchment paper. Scoop out tablespoon-sized portions of dough and roll them into balls with your hands. - Step six: Roll in powdered sugar
Generously coat each dough ball in powdered sugar. Make sure they’re fully covered—don’t be shy here! The more powdered sugar, the more dramatic the crinkle effect. - Step seven: Bake to perfection
Place the sugar-coated dough balls on the baking sheet, spaced apart to allow for spreading. Bake just until the tops are cracked and the edges are set. The centers should still be soft—they’ll continue to set as they cool. - Step eight: Cool and enjoy
Let the cookies rest on the baking sheet for a couple of minutes before transferring them to a wire rack. Once completely cooled, they’re ready to enjoy—or package up as edible gifts.
Tips, Variations, and Storage Options
Baking Tips for Success
If you want picture-perfect red velvet crinkle cookies, a few small techniques can make a big difference. Here’s what experienced bakers recommend:
- Chill your dough: It may feel like an extra step, but chilling is non-negotiable. The dough needs time to firm up so it can hold its shape in the oven and give you those beautiful, crackled tops. If your kitchen is warm, an extra chill time won’t hurt.
- Use gel food coloring: For deep, vivid red cookies, gel coloring is your best friend. It’s more concentrated than liquid dye, which means a little goes a long way—and you won’t have to alter the dough consistency to achieve that signature color.
- Coat generously in powdered sugar: Don’t skimp on this. A thick coating of powdered sugar is what gives crinkle cookies their snowy exterior. If your cookies aren’t crinkling, it may be because the dough is too warm or the sugar layer was too thin.
- Don’t overbake: These cookies are meant to be soft. If you wait until the entire cookie looks dry, you’ve gone too far. Pull them out when the tops have cracked and the edges are just set—they’ll finish firming up as they cool.
- Fun Flavor Variations: While red velvet crinkle cookies are stunning on their own, adding a twist can take them to the next level. Here are a few ways to play with the flavor profile:
- Add white chocolate chips: For a creamy surprise, stir in white chocolate chips before chilling the dough. The sweetness of the chips balances the cocoa and adds a little indulgence in each bite.
- Swap the vanilla extract: For something different, try almond or peppermint extract instead of vanilla. Almond gives the cookies a slightly nutty depth, while peppermint adds a cool wintery vibe—great for holiday gifting.
- Fill them: Try sandwiching two cookies with cream cheese frosting for the ultimate red velvet experience. You can also add a dab of frosting or a drizzle on top for a pretty finish.
- Make them mini: Use a smaller cookie scoop for bite-sized crinkles—perfect for party platters, dessert boards, or kids’ lunches.
Storage Tips
Red velvet crinkle cookies are great make-ahead treats. Here’s how to store them for maximum freshness:
- Room temperature: Store in an airtight container for up to four days. Add a slice of bread to the container to keep them extra soft.
- Refrigerator: They can last up to a week in the fridge, but bring them to room temperature before serving for the best texture.
- Freezer (baked): Freeze cooled cookies in a freezer-safe bag or container for up to two months. Thaw at room temperature or warm slightly in the microwave.
- Freezer (dough): Roll into balls (skip the powdered sugar), freeze on a tray, then transfer to a bag. When ready to bake, let them sit at room temp for about twenty minutes, roll in sugar, then bake.
Equipment Needed
You don’t need fancy tools to make red velvet crinkle cookies. Here are the kitchen basics you’ll need:
- Mixing bowls: One large bowl for wet ingredients and one medium for dry. Stainless steel or glass both work well.
- Whisk and spatula: Use a whisk to blend the wet ingredients smoothly and a spatula to gently combine the dough without over-mixing.
- Measuring cups and spoons: Precision matters when baking. Accurate measurements help ensure your cookies rise correctly and hold their shape.
- Baking sheet with parchment paper: Lining the pan helps prevent sticking and makes cleanup a breeze. A light-colored sheet promotes even baking.
- Cookie scoop or tablespoon: For evenly sized cookies and a consistent bake, a scoop is a small investment that makes a big difference.
Optional but helpful: a wire cooling rack, which allows the cookies to cool evenly and avoid sogginess on the bottom.
Related Recipes
If you loved red velvet crinkle cookies, you’ll likely enjoy these other festive and flavor-packed cookie ideas:
- Chocolate peppermint crinkle cookies: A holiday classic with a minty twist. Rich chocolate dough rolled in powdered sugar with crushed peppermint candies for extra crunch.
- Lemon crinkle cookies: Bright, zesty, and just as pretty. These sunny-yellow cookies offer a tangy contrast to the deep cocoa tones of red velvet.
- Fudgy chewy brookies: A rich combo of brownies and cookies in one treat. Soft, gooey centers with crisp edges—perfect for chocolate lovers who want both.
- Strawberry crunch cheesecake tacos: Crispy taco shells filled with creamy cheesecake and fresh strawberries, finished with a sweet crunchy topping for a fun dessert twist.
- Snickerdoodle cake cookies: If you like soft and spiced cookies, snickerdoodle-style cake cookies coated in cinnamon sugar might be your next obsession.
These related recipes are easy to make and just as crowd-pleasing—ideal for building out your cookie tray or switching things up throughout the seasons.
Pairing/Serving Suggestions
Red velvet crinkle cookies are versatile, photogenic, and tasty enough to be the star of any dessert spread—but pairing them well makes the experience even better. Whether you’re serving them at home or packing them up for a gathering, these ideas will elevate your presentation.
With hot drinks
These cookies pair beautifully with a warm cup of coffee, hot chocolate, or a spiced chai latte. The slight tang and cocoa richness complement bold or creamy drinks especially well. For a more decadent combo, serve them with peppermint mocha or vanilla bean lattes.
As part of a dessert board
Include red velvet crinkle cookies on a cookie charcuterie board with white chocolate bark, dark chocolate truffles, dried fruit, and fresh berries. Their deep color and powdered sugar finish make them visually pop among other treats.
Stack and wrap as edible gifts
Bundle stacks of cookies with twine or place them in a clear cellophane bag for an easy homemade gift. Add a small label or tag for extra charm—perfect for coworkers, neighbors, or holiday exchanges.
Serve warm with ice cream
Try warming a few cookies slightly in the microwave and serving them alongside a scoop of vanilla bean or cream cheese swirl ice cream. The contrast in temperature and texture is irresistible.
Use them as cake toppers
For a festive presentation, place a crinkle cookie on top of cupcakes or cakes as a decorative element. It adds texture and makes for a cute edible garnish.
Frequently Asked Questions
Do I have to chill the dough?
Yes. Chilling the dough is essential for the cookies to hold their shape and develop the classic crinkled look. It also helps prevent spreading and ensures even baking.
Can I make these without food coloring?
Absolutely. The flavor stays the same without the red color, though they’ll look more like cocoa crinkle cookies. If you prefer a natural dye, try beet powder or natural food-based colorings.
Why didn’t my cookies crinkle?
This is often due to warm dough or not enough powdered sugar. Make sure your dough is properly chilled and the cookies are generously coated before baking.
Can I use butter instead of oil?
You can, but the texture may change slightly. Butter will give you a richer flavor but may make the cookies a bit firmer. For soft, cake-like cookies, oil is preferred.
How long will these stay fresh?
Stored properly in an airtight container, they’ll stay soft for about four days at room temperature. You can also refrigerate or freeze them for longer shelf life.
Nutrition Information
Here’s an estimate for one standard cookie (based on a batch yielding around two dozen):
- Calories: around one hundred twenty
- Carbohydrates: about eighteen grams
- Fat: around five grams
- Protein: roughly one gram
- Sugar: about twelve grams
This is a general guideline and can vary slightly based on portion size or added ingredients like chocolate chips.
Seasonal and Occasion Variations
Red velvet crinkle cookies are a natural fit for holidays and themed celebrations. Here’s how to tweak them throughout the year:
- Winter holidays: Add a touch of peppermint extract for a wintery twist. Dust the finished cookies with edible glitter for extra sparkle, or sandwich them with peppermint frosting.
- Valentine’s Day: These cookies practically scream love with their bold red color. Use a heart-shaped cutter or press a white chocolate heart into the center after baking for a romantic touch.
- Fourth of July: Pair red velvet crinkle cookies with blueberries and white-frosted sugar cookies for a patriotic dessert board.
- Halloween: Add black or orange sprinkles to the powdered sugar before rolling, or drizzle with a light white glaze tinted with spooky colors.
- Birthday celebrations: Top each cookie with cream cheese frosting and colorful sprinkles for a cupcake-style twist that works for all ages.
- Wedding or baby showers Present them on a tiered stand alongside other soft-hued cookies. You can even match the food coloring to the event’s color scheme.
My Recipe Tips
Want to bake the most successful batch possible? Here are my go-to tips to make sure your red velvet crinkle cookies always come out bakery-quality:
- Sift your powdered sugar: Lumps can make coating uneven. Use a fine mesh sifter or whisk it well to create a smooth, fluffy surface for rolling.
- Use a cookie scoop: A small or medium cookie scoop ensures uniform size, which is important for even baking and a polished final look.
- Double the batch: These disappear fast. If you’re baking for a group or planning ahead for the freezer, double the ingredients and save yourself time later.
- Let them cool on the tray: Don’t move them too quickly after baking. Letting them rest on the baking sheet helps the centers set properly without overbaking.
- Test-bake one or two first: If you’re unsure about oven timing, bake just a couple cookies first to check how they spread and crinkle. This helps prevent a whole batch from over- or under-baking.
Conclusion
Red velvet crinkle cookies are more than just a treat—they’re a baking experience that combines ease, flavor, and visual charm. From their rich, cocoa-kissed flavor to their snowy sugar coating, they deliver something special in every bite. Whether you’re making them for a party, gifting them to loved ones, or simply enjoying them with a cozy drink on the couch, these cookies offer everything you love about red velvet in a soft, crinkled form.
Now that you’ve got the full guide—plus storage tips, seasonal variations, and expert tricks—you’re ready to bake a batch (or two) of your own. Don’t be surprised if they become a regular request in your household. And if you’re looking for more sweet ideas, be sure to explore our other festive cookie recipes for even more inspiration.

Ingredients
1½ cups all-purpose flour
¼ cup unsweetened cocoa powder
1 teaspoon baking powder
¼ teaspoon salt
½ cup unsalted butter, softened
¾ cup granulated sugar
1 large egg
1 tablespoon milk
1 teaspoon vanilla extract
1 tablespoon red food coloring
½ cup powdered sugar (for rolling)
Instructions
In a bowl, whisk together flour, cocoa powder, baking powder, and salt. Set aside.
In a separate bowl, beat the butter and granulated sugar until light and creamy.
Add the egg, milk, vanilla extract, and red food coloring. Mix until fully combined.
Gradually add the dry ingredients to the wet mixture, mixing just until a soft dough forms.
Cover the dough and refrigerate for at least 30 minutes to make it easier to handle.
Preheat your oven to 350°F (175°C). Line a baking sheet with parchment paper.
Scoop tablespoon-sized portions of dough and roll into balls.
Roll each ball generously in powdered sugar until fully coated.
Place cookies on the baking sheet, spacing them about 2 inches apart.
Bake for 10–12 minutes, until the cookies spread and crack on top but remain soft in the center.
Let cool on the baking sheet for 5 minutes, then transfer to a wire rack to cool completely.
